By Andy from Baiyear factory
Upated November 5, 2022
Regarding the introduction of the specific production steps of the mold, we have divided it into 2 articles to introduce, this is the second article, the key content: 1: Custom Plastic Injection Mould 2: Factory Mold Making 3: Plastic Injection Mould 4: Precision injection mold 5: plastic mould die maker 6: mold design for injection molding 7: mold making and casting 8: mold making process
7. Internal mold quenching
(1), work before quenching
a) Drilling the nozzle hole: Drill the nozzle hole on the upper die according to the requirements of the drawing. When drilling the nozzle hole on the upper die, pay attention to the same center as the bottom hole.
b) Drilling the shunt cone hole: Drill the shunt cone hole in the center of the lower die runner according to the requirements of the drawing, then prepare the shunt cone, and drill the thimble hole on it.
c) Drilling the water hole: According to the requirements of the icon, drill the water (cooling water) hole on the side of the inner mold.
d) Drill and tap the fixing hole (blind hole) on the joint surface of the inner mold and the mold frame.
e) If there are needles on the inner mold, the needle holes should be drilled.
(2), drill the thimble hole
The ejector pin is an important part of the mechanical work of the mold. Its function is to separate the product from the mold core through the ejector action of the beer machine, so as to achieve the effect of overall ejection. The processing accuracy of the ejector pin directly affects the quality of the mold. and service life. Process requirements:
a) The position of the thimble hole should be processed according to the overall design requirements of the product, to avoid thin-walled and parts that affect the appearance as much as possible. In order to avoid the beer handle (slope) in the transition position, and the broken needle during production, it should be used before drilling the thimble hole. Drill the drill tip of the smaller section from below, and then use the drill tip of the larger section to drill through from the reverse side.
b) When machining holes, check the verticality between the axes of the drilling and milling machines used and the working table.
c) The thimble hole should be left with a margin during processing, so as to ensure the mechanical transition between the hole and the thimble after reaming with a reamer. If it is too tight, the hole and the thimble will be burnt out during production; There are fronts.
d) When drilling the thimble hole, it should be ensured that the water transport hole will not be drilled.
e) When drilling thimble holes below 1.5mm, the length of the transition part should be kept between 20mm and 30mm as far as possible to avoid vacant holes, and then the vacant section (the gap between the thimble and the thimble hole) should be processed. The hole-avoidance aperture should be about 0.5mm larger than the transition aperture. When it is too large, the long thimble is easy to bend and break.
(3), internal mold quenching
After the inner mold is good, it is sent to the heat treatment plant for quenching, so that the inner mold can meet the hardness requirements.
8. Drop frame
(1), drop frame
After the inner mold is quenched, it is put into the mold frame for coordination inspection. To this end, it is necessary to grind and trim the joint edge of the mold frame and the inner mold, so that the inner mold can completely fall into the mold frame and the matching is normal.
(2) Drill inner mold fixing holes on the mold frame
Screw the positioning center aid into the inner mold positioning screw hole, and then press the inner mold into the mold frame, so that the auxiliary tool marks the center of the hole on the mold frame. Then take out the inner mold and screw out the auxiliary tools. Drill holes on the mold frame according to the drilling marks, and finally turn the mold frame over and drill holes.
9. Reverse the line again
This step is carried out after the inner mold is dropped, and the purpose is to check the fit of the two sides of the working surface of the row and the inner mold. Apply red paint to the side parts of the inner mold and the row position, insert the row position, and press the row position in place. The opposite part of the row should be completely printed with red paint, otherwise it should be polished, repaired, and checked repeatedly until the red paint is completely printed.
10. Row quenching
After the line is good, it is quenched to make it meet the hardness requirements.
11. Pressure seat (oblique chicken)
(1), processing row position slope
According to the requirements of the icon and technical conditions, the inclined plane is processed on the sliding surface of the row position.
(2), pressure seat
a) The slope of the row slope and the size of the upper frame of the mold frame.
b) Drill positioning holes on the upper die frame and the pressing seat according to the inclination of the row slope and the row position, and fix the pressing seat on the upper mould frame.
c) Drill a bevel hole on the row position, and the bevel hole must be 2 degrees smaller than the bevel.
d) Drill the beveled positioning holes on the upper die according to the position and inclination of the beveled holes drilled on the row position, and then install the beveled edges to check the alignment. The hypotenuse hole is generally 2 families larger than the hypotenuse.
12, the overall model
After the inner mold, row position, insert needle, and mold frame are all matched, the upper and lower molds are combined to form the mold, and the upper and lower inner molds, rows and inserts are checked with red paint. , Repair the shovel until it is completely fitted.
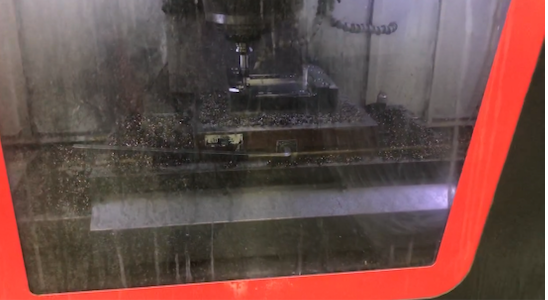
13. EDM machining
EDM is based on the principle of EDM. When the copper male and the workpiece are close to each other, the inter-electrode voltage will cause the electrolyte to ionize and break down at the closest position between the two electrodes to form a spark discharge, resulting in a large amount of heat energy instantaneously generated in the spark channel, making the The metal is partially melted, even vaporized, and evaporated to erode the metal. It can be used for any conductive material to process any hard, brittle, soft, sticky or high melting point metal material, including heat-treated steel and alloys, tool electrodes (copper male ) and the workpiece are subject to electrical corrosion to produce corrosion (vapor and solid). The electrical corrosion of the copper male will cause electrode loss, and the electrical corrosion of the workpiece will make it meet the forming accuracy requirements.
Process requirements:
(1) Clamp the copper male firmly on the spindle chuck of the machine tool, and adjust the reference position to make it meet the requirements of machining accuracy. Some large and thin three-dimensional copper males are easy to deform and bend during processing, and they should be evenly fixed on the three-dimensional copper males with a tripod-type fixing clip.
(2) Install the workpiece on the machine table and adjust the reference accuracy.
(3), according to the processing requirements of each part of the electro-erosion processing.
14. Polishing (die-saving)
Mold polishing is to process the mold cavity and core finish to the appearance requirements of the product. It is an important part of the mold manufacturing process. The quality of the polishing accuracy directly affects the appearance quality of the product. There are many ways of polishing, such as machine polishing (ultrasonic), grinding machine polishing and manual polishing. The most commonly used manual polishing under general conditions, its process requirements:
(1) When polishing and saving molds, you must see and understand the internal and external requirements of the product.
(2) Before polishing, use a file to trim the surface traces left by various processing.
(3) On the basis of trimming with whetstone, use sandpaper from coarse to fine to save light according to product requirements.
(4) For products with special requirements, such as transparent parts, they must be polished with abrasive paste.
(5) The polished workpiece must have clear lines, bright and smooth, and no rounded corners at the jaws.
15. With thimble
Drill the lower die frame and the face needle plate through the ejector pin hole on the lower inner mould, then mill the tube pin hole at the thimble hole on the face needle plate, and insert the ejector pin into the face needle plate, the lower mould frame and the lower inner mould. Make sure that the ejector pin is flush with the outlet of the upper inner mold, and then install the ejector pin at the edge of the ejector pin hole of the face pin plate, and clamp the ejector pin in place.
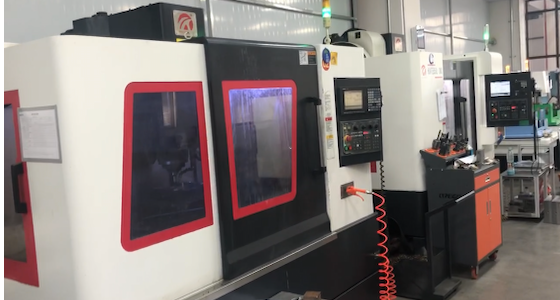
16. Test mode
(1), equipped with accessories such as the sword body, and assemble the mold.
(2) Install the mold on the beer machine according to the beer machine operating procedures to carry out beer parts. Mold trial is an important part of the molding process. In order to accurately determine the quality of the mold in the form of beer parts, the clamping pressure, injection pressure, electric heating temperature, melting furnace temperature, etc. must be adjusted before the mold test, and each time. Make a trial record. The workpiece for beer testing must have no cold streaks, no batch front, no shrinkage, bubbles within 15%, no obvious jaws and water marks, and the surface is smooth and the mold is smooth. If it fails to meet the requirements, it is necessary to repair and try again.
17. Modification
According to the test results, the mold is trimmed, and the mold is modified according to customer requirements and assembly requirements. Mold modification is an important part of mold manufacturing. The purpose of mold manufacturing is mass production. The speed and accuracy of mold modification directly affect product quality and production progress. The task of changing the mold is to ensure that the sign-off (sales office) assembled without auxiliary tools for coordination adjustment meets the market (customer) and vibration box requirements (except for surface decoration requirements). The office of the engineer’s installation shall be sent to the customer’s office after an internal review. According to the problem of the mold itself, the engineer will provide the mold modification information according to the assembly requirements and customer requirements. Modification materials must be written clearly and the language is easy to understand and without ambiguity. The data requirements must be clear and complete, the reference points must be marked for those with front and rear position requirements, and the figure must be done for those with shape requirements. When the engineer submits the mold modification information to the mold modification personnel, he must clearly explain the main points of the mold modification, the parts to be modified, the requirements for modification, and the purpose of modification. After the decision of the person, it can be executed according to the best.
18. Mold release
After the mold is modified, tested, signed, and the quality fully meets the customer’s requirements and the toy assembly requirements, the mold can be handed over and put into production.
Contact:Andy Yang
What’s app : +86 13968705428
Email: Andy@baidasy.com
Post time: Nov-29-2022